【3D】5-显示动态图
条评论这是3D可视化教程系列的文章,如果第一次阅读请先阅读《3D可视化教程导读》。
源码及3D项目文件
源码及工程项目都放到github上。
源码:threejs-example
效果
最终在3D里面看到一个动态图: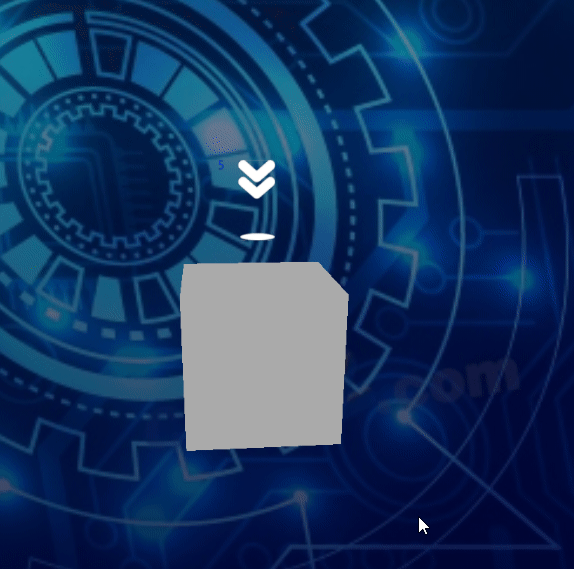
雪碧图显示动态效果的原理
雪碧图是一张包含多张图片的图,我们可以在一张图上放几帧动画的图片效果,然后定时轮流显示下一帧即可达到动画效果。
我用PS自己做了一个,PS项目文件放到了Blender工程项目对应位置,PS制作图片时,最好添加参考线。理论上来说,帧数越多效果越好,不会显示卡顿。图片格式注意需要PNG才会有透明背景效果。
为了方便区分,我还在每一帧图片的左上角添加了数字方便分析。在网页上显示及代码如下所示,更详细的原理说明看附录连接的文章:1
2
3
4
5
6
7
8
9
10
11
12
13
14
15
16
17
18
19
20
21
22
23
24
25
26
27
28
29
30
31
32
33
34
35
36
37
38
39<style>
@keyframes arrow-animation {
0% {
background-position:0 0px;
}
20% {
background-position:0 -256px;
}
40% {
background-position:0 -512px;
}
80% {
background-position:0 -768px;
}
100% {
background-position: 0 -1024px;
}
}
.arrow {
width: 256px;
height: 256px;
animation: arrow-animation 5s steps(1) infinite;
background-repeat: no-repeat;
background-position: 0 0;
background-image: url('/blog_images/3d/箭头雪碧图.png');
border: 1px solid white;
}
.fast{
animation: arrow-animation 0.75s steps(1) infinite;
}
</style>
<div style="display: flex;background-color:#cccccc;">
<img src="/blog_images/3d/箭头雪碧图.png" alt="" srcset="">
<div class="arrow"></div>
<div class="arrow fast"></div>
</div>
代码说明
类似的,在3D里面显示动图的效果,原理跟在页面上显示是一样的,就是实现代码不一样而已。先加载图片作为纹理,纹理只显示一帧的图片并定时轮换到下一帧图片:
1 | let plane = null; |
plane.lookAt(camera.position);能让平板始终朝向摄像头。